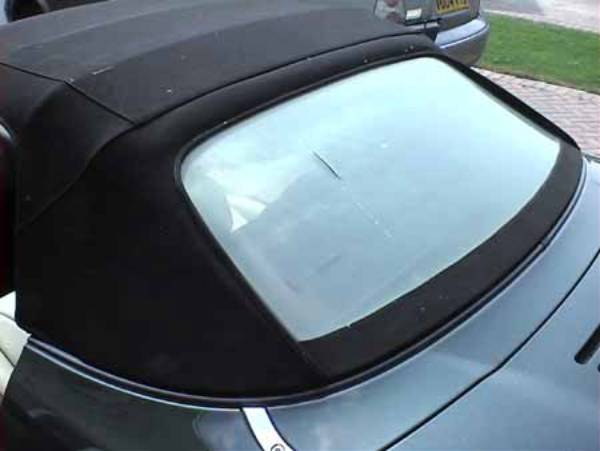
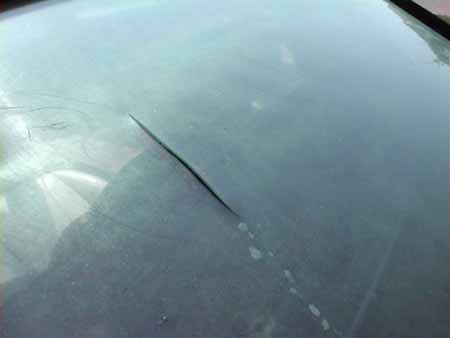
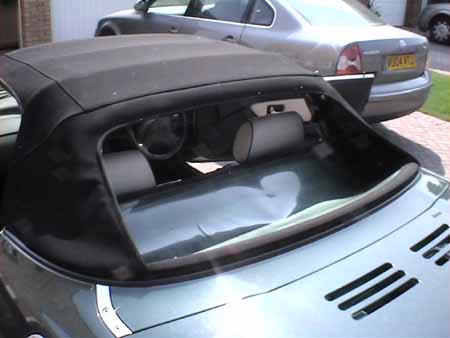
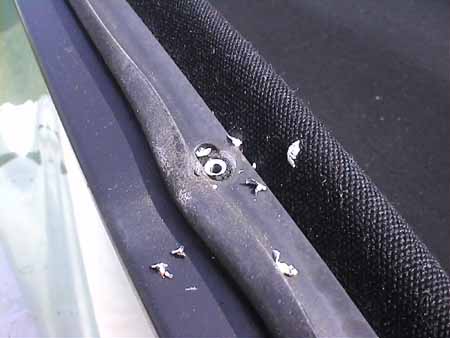
For several years I had always unzipped the screen before dropping the hood, but with the addition of rollbars, this became a little more awkward, so I opted for the lazy way, okay in Summer, but not so good in Spring.
The only solution is to replace the plastic, and this can be done several ways.....
1. Get someone to do the whole thing at a cost of about Ł 175 including VAT ( April 2006 )
2. Remove the screen and surround yourself and get a new plastic section sewn in for about Ł 105 including VAT ( April 2006 )
I opted for method 2, but remember, some firms operate an exchange system, whereby they send you a refurbised part and you return your damaged one. If this is the case, you need to make sure that either you send the whole section includig both halves of the zip, or you ensure the zip halves match - Over the years, different sizes have been used. It's a lot more work to remove the top section of the zip.
I found a local firm that could provide the correct plastic - 1mm thick and tinted pale green - with a quick turn around.
 Wessex Car Trimming Works
, Southampton, Tel 023 8001 7295
Wessex Car Trimming Works
, Southampton, Tel 023 8001 7295Now I'm not the only person to have done this repair, and since Jim Prior has covered the topic so well, he has kindly allowed me to include his page within mine. If you want to check for any updates Jim may have made, go to http://leisure.prior-it.co.uk/replace-mgf-window.shtml or visit his whole site at Prior I.T.
Just a couple of extra comments...............
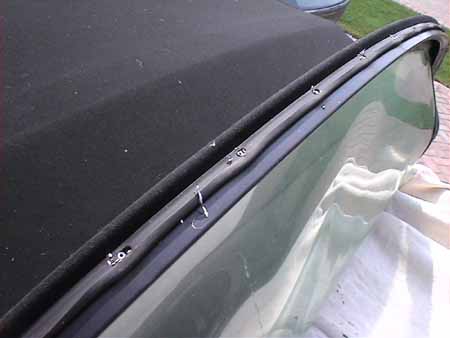
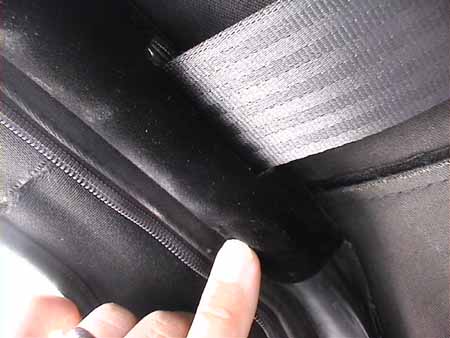
 This is the repaired screen, still covered in cling film to save it getting scratched. You can see the section that is removed with just the lower half of the zip.
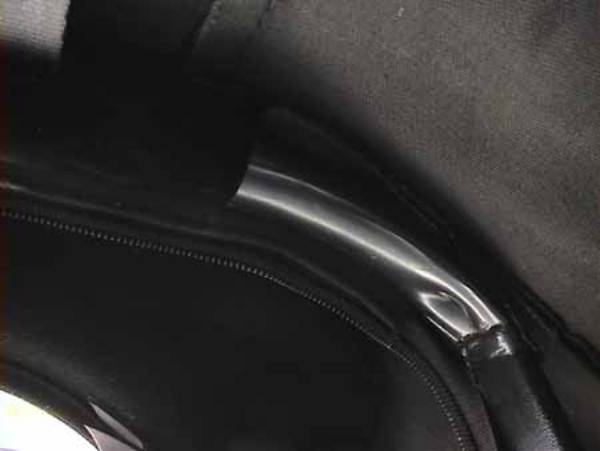
 Material specification of the new window, and a very sound hint !
 Nice and clear ! Mind you, the old one was not too bad, after a great deal of Greygate polish and elbow grease!
Below are the full instructions, courtesy of Jim Prior: (as of 22 April 2006)
|
Introduction What you get: In this project I
explain with photos how to replace the rear plastic window of a Rover MGF.
The job can be done in a long afternoon, and is sure to save you money. The
most difficult part is likely to be obtaining the correct replacement window
in the first place. Also at the end of this page I give a warning about scams
when selling your car on the Internet. PLEASE READ IT FOR YOUR OWN SAKE !! |
|
||
It happened
to me, just as it has probably happened to countless other MGF owners. http://www.mgfcar.de/softtop/replacement.htm Another page which also gives (brief) instructions, and offers replacement windows or a complete fitting service can be found at:- http://www.softtopwindows.co.uk Special Note: My photos and instructions cover replacing only the rear window (and one half of the horizontal zip), so leaving the other zip half attached to its black felt covered zip retainer on the canopy frame. This is why when you order a replacement you must make sure the zips are of the correct type, so you can zip the new one in place correctly. If your zip is damaged, you will need to make sure you get a complete new zip set which includes the black felt zip retaining strip too. The instructions at the MGFCar.de web site (1st link above) do detail the complete fitting, but it is more involved and sounds potentially more messy. If you can get away with doing just the first half of the job, it will be quicker and easier.
Main Tools Required
Main Parts Required
Obtaining the Correct Replacement Rear Window I found the official MGF web site at http://www.mgf.co.uk From there I
was able to find a dealer who supplied me with a replacement window. Useful Resources Official MGF web site: http://www.mgf.co.uk Original window replacement page: http://www.mgfcar.de/softtop/replacement.htm Offers replacement windows or a complete fitting service: http://www.softtopwindows.co.uk Very useful MGF Maintenance site is Tony's Green Bullet, which provides a wide variety of maintenance jobs, complete with photos: http://www.apttony.co.uk/ Getting Started Before you start here are a couple of tips:-
Lower both
of the windows and open the doors wide. Turn on the stereo with some good
sounds!
The hood well carpet covers the retaining clips.......
Notice in my car the original rivets are silver, indicating they have been replaced once already!
Close-up of one retaining clip......
Pull back the rear edge of the hood well carpet to reveal the 5 clips......
Just lift up each clip to release, then drop it down. Make sure ALL the clips are properly released.
Now get outside the car, and you should find that the rear of the hood will now fold/pull upwards to release it from the body. It may require a bit of a firm but gentle tug........
Lift it evenly across both sides, it should now freely lift up and down.......
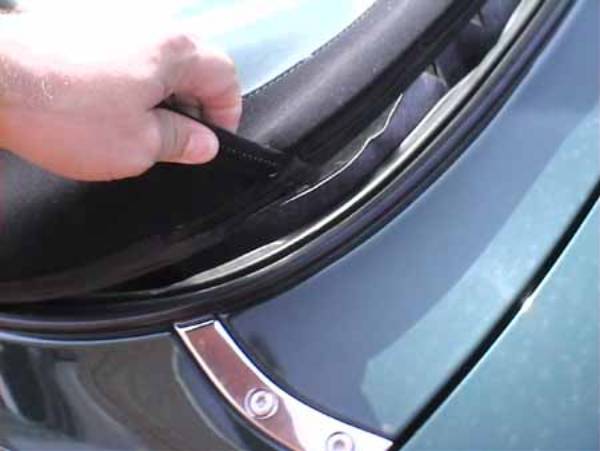
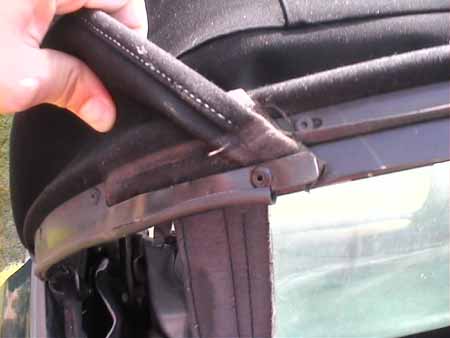
Inside the car again, undo the window zip......
You should now be able to lay the window flat down inside the hood well (just like you should do normally when lowering the convertible roof - but probably didn't coz its too much trouble and which is why the window split in the first place!). Now the whole rear canopy is free to lift upwards......
Before you get started, take a look at the existing rivets to see what needs removing. In this photo you can see 3 rivets, two in the middle of the photo, and one just below my thumb.....
Here is the same piece, folded down where you can see another silver head rivet just to the left of the velcro strip.....
Next, cover it all up with a good thick layer of cloth......
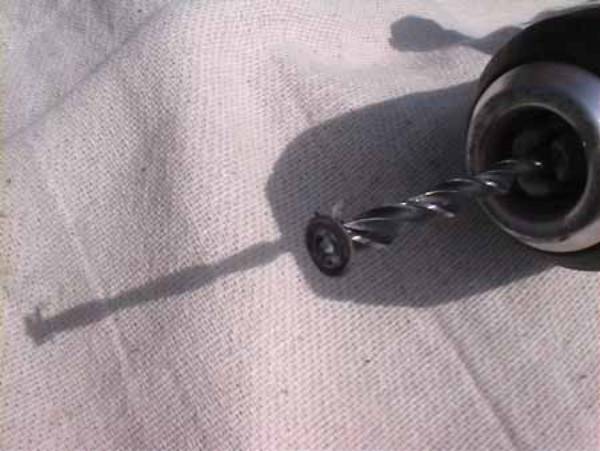
Now you need
to drill out the old rivets. This is actually simpler than it sounds, but it
does require a lot of care because if you widen the original holes, the new
rivets will not be able to grip properly, and you will have to use a larger
diameter rivet.
The first rivet has been beheaded, and knocked through, so releasing the metal clip holding the hood. Now you can get at the steel retaining strip......
Caution: Note that the metal
retaining strip is made of steel and may cause your 7mm drill bit to catch.
It might be wise to swap to a smaller drill bit. You do not want to
widen the slotted holes in the steel retaining strip, because the new rivets
would not be able to hold it when popped in.
Now you're at the other side. You can see clearly in this photo the slotted steel strip and the beheaded rivets. Like I said be careful when drilling out not to widen the slots when drilling......
A close-up of one of the central rivets that was holding the steel strip in place.......
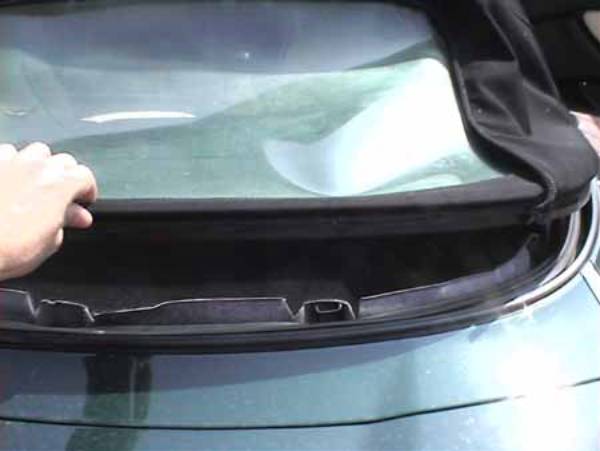
Once all the heads have been drilled off, the metal retaining strip can be lifted clear and the rear window can be released from the velcro strips at each side, and pulled clear of the car...........
Now you see it, and now you don't.......
OK - So far, so good - Take a break! Now the next
steps if you were completely removing the other zip-half as detailed in the
MGFCar.de instructions involve the black felt strip. I did not need to do
this step. You might not need to either. However I have included
these photos for reference in case you need to do the complete job.
And here my thumb is pressing where another nut is located.
Not quite sure why I've put the next photo in! Maybe its useful?
This just shows some of the roof tensioning webbing passing through the bow frame.....
And this is Bobby next door trying to be helpful.....!!!! He's a wag isn't he?!
OK.
Tea-break over, time to get on.
Learning to Pop-Rivet Have you
pop-riveted before? If not, well its dead simple. I recommend you try popping
a rivet into nothing first so you see how much pressure you have to apply to
actually pop it.
Get a hammer and give the top of the gun a couple of knocks to make sure the rivet is as far into the hole as it will go....
Now, while
holding the gun firmly against the parts, squeeze the gun handles together
hard. As explained above this takes considerable pressure because its got to
pull the pin up into the rivet, which squeezes the rivets sides outward to
grip the hole, and then you keep on squeezing until the pin under extreme
tension, "snaps" off, so releasing the gun from the rivet.
Here is the side clip all riveted up......
With everything neatly riveted together, you can lift the hood right up, remove the blanket, and hoover the hood well carpet again....
Lift up the hood well carpet and give a good hoovering under there too.
Finally
lower the rear hood (paint the outside of the rivets beforehand if necessary)
and do up the clips on the inside, making sure the hood carpet edge is pushed
back neatly behind the rubber flip seal again. Check all the way around to
make sure its all neatly in place.
The new rivets even show up from outside, so you might want to give their outer faces the same matt black treatment.
On my car the zip fastener hangs down at one side, and when travelling at speed with the windows open this would tap annoyingly on the metal frame........
.....so I fastened some velcro to it so as to hold it up out of the way.
LAST THING - DO UP THE FRONT HOOD CATCHES BEFORE YOU DRIVE !!!! Hooray - job done! Now I can valet the car, and get it sold. What a pity - She looks so damn good!
And she's gone now :-(
|
|||